The Best Easy Chocolate Bun Recipe for a Sweet Treat

Indulge in the warm, comforting embrace of freshly baked chocolate buns. This easy chocolate bun recipe serves as a comprehensive guide, walking you through every step of creating these delectable treats at home. Ideal for breakfast, dessert, or an afternoon snack, these buns combine the fluffy texture of homemade bread with rich, melted chocolate. Whether you’re a novice baker or a seasoned pro, this guide is designed to help you achieve success.

Why Make Chocolate Buns at Home?

Baking chocolate buns at home offers numerous benefits that make the effort worthwhile:

  • Freshness Guaranteed: There’s nothing quite like the aroma and taste of freshly baked buns straight from your oven.
  • Quality Control: You have the freedom to use high-quality ingredients without preservatives or artificial additives.
  • Customization: You can tailor the recipe to suit dietary preferences, such as making them vegan or gluten-free.
  • Cost-Effective: Homemade buns are more economical than their store-bought counterparts, especially when baking in bulk.

Furthermore, baking at home allows you to experiment with various flavors and textures, ensuring that each batch meets your personal preferences. Consequently, you can create unique variations that cater specifically to your taste.

Ingredients You’ll Need

For the Dough:

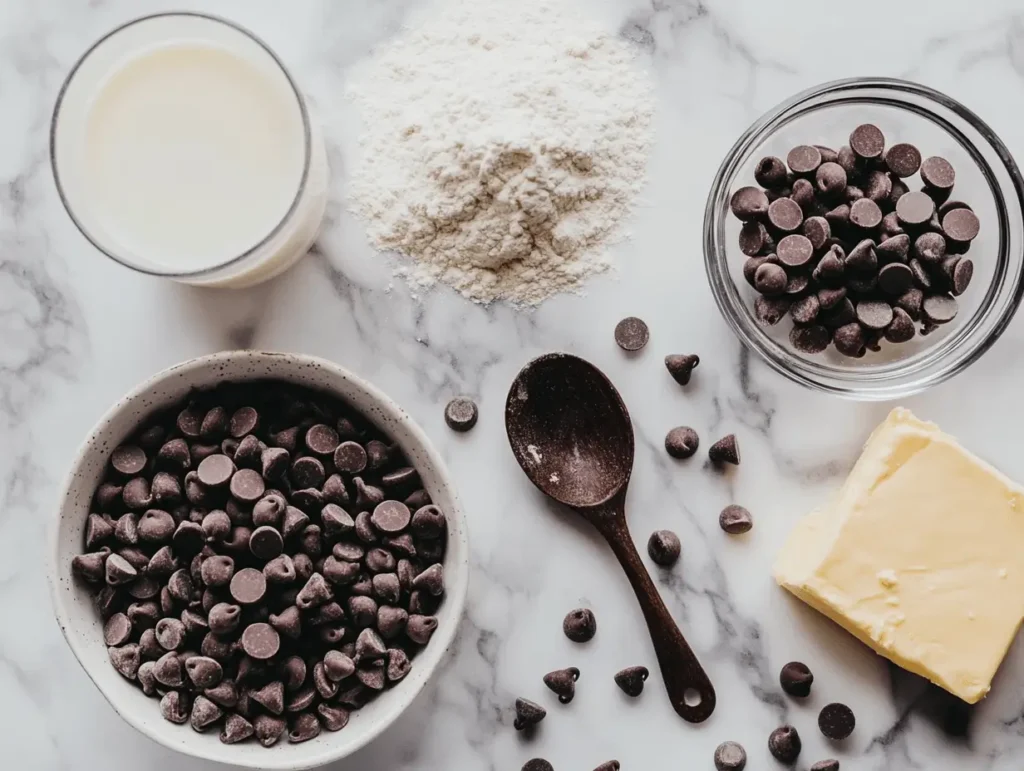
  • 3½ cups (440g) all-purpose flour
  • 1 packet (7g) instant yeast
  • ¼ cup (50g) granulated sugar
  • 1 teaspoon salt
  • 1 cup (240ml) warm milk (110°F/45°C)
  • ¼ cup (60g) unsalted butter, softened
  • 1 large egg, room temperature

For the Chocolate Filling:

  • 1 cup (175g) dark chocolate chips or chopped dark chocolate
  • 2 tablespoons unsweetened cocoa powder
  • 2 tablespoons powdered sugar (optional for added sweetness)

For the Glaze:

  • ¼ cup (60ml) milk
  • 1 tablespoon unsalted butter
  • 1 tablespoon granulated sugar

Essential Baking Tools

To ensure a smooth baking experience, gather the following tools:

  • Mixing bowls of various sizes
  • Measuring cups and spoons for precise measurements
  • Kitchen scale (optional but recommended for accuracy)
  • Whisk and spatula for effective mixing
  • Stand mixer with dough hook attachment (optional for easier kneading)
  • Rolling pin for shaping the dough
  • Baking tray lined with parchment paper to prevent sticking
  • Pastry brush for applying glaze evenly
  • Clean kitchen towel or plastic wrap for covering the dough during rising
  • Oven thermometer to ensure the oven maintains the correct temperature
  • Cooling rack to allow the buns to cool properly after baking

Having these tools on hand will simplify the baking process and contribute to the success of your chocolate buns.

Step-by-Step Instructions

Step 1: Prepare the Dough

  1. Activate the Yeast (if using active dry yeast):
    • In a small bowl, combine the warm milk and a pinch of sugar.
    • Sprinkle the yeast over the milk and let it sit for 5–10 minutes until it becomes frothy. This step ensures that the yeast is active.
  2. Mix Dry Ingredients:
    • In a large mixing bowl, whisk together the all-purpose flour, granulated sugar, and salt. Combining these ingredients first helps in even distribution.
  3. Combine Wet and Dry Ingredients:
    • If using instant yeast, add it directly to the dry ingredients. Then, incorporate the softened butter and egg into the mixture.
    • Pour in the warm milk (with activated yeast if applicable). This combination will form the base of your dough.
  4. Form the Dough:
    • Stir the mixture until it forms a shaggy dough. This indicates that the ingredients are starting to come together.
  5. Knead the Dough:
    • Transfer the dough to a lightly floured surface.
    • Knead by hand for about 8–10 minutes until the dough is smooth and elastic. Alternatively, use a stand mixer with the dough hook attachment on medium speed for 5 minutes.
    • Tip: Proper kneading develops the gluten, giving the buns their fluffy texture.
  6. First Rise:
    • Shape the dough into a ball and place it in a greased bowl to prevent sticking.
    • Cover with a clean kitchen towel or plastic wrap.
    • Allow it to rise in a warm, draft-free place for 1–2 hours, or until it has doubled in size. This rising process is crucial for achieving a light and airy bun.

Step 2: Prepare the Chocolate Filling

  1. Melt the Chocolate:
    • Place the dark chocolate chips in a heatproof bowl.
    • Melt them using a double boiler or microwave in 30-second intervals, stirring in between to prevent burning.
  2. Mix in Cocoa Powder and Sugar:
    • Once melted, add the unsweetened cocoa powder to the chocolate.
    • Stir in the powdered sugar if you prefer a sweeter filling.
    • Mix until smooth and set aside to cool slightly. This filling will provide the rich chocolate center for your buns.

Step 3: Shape the Buns

  1. Punch Down the Dough:
    • After the first rise, gently punch down the dough to release the air bubbles that have formed.
  2. Divide the Dough:
    • Turn the dough onto a floured surface.
    • Divide it into 12 equal pieces using a dough cutter or knife. Ensuring equal portions guarantees uniform baking.
  3. Fill the Buns:
    • Flatten each dough piece into a small disc, about 4 inches in diameter.
    • Place a teaspoon of the chocolate filling in the center of each disc.
    • Fold the edges over the filling, pinching them together to seal. This method prevents the filling from leaking during baking.
    • Gently roll each filled dough into a smooth ball for an even shape.
  4. Second Rise:
    • Place the buns seam-side down on the prepared baking tray, spacing them evenly to allow room for expansion.
    • Cover with a kitchen towel and let them rise for another 30–45 minutes until they become puffy. This second rise enhances the softness of the buns.

Step 4: Bake the Buns

  1. Preheat the Oven:
    • About 15 minutes before baking, preheat your oven to 350°F (180°C). This ensures the oven reaches the correct temperature for even baking.
  2. Optional Egg Wash:
    • For a golden crust, brush the tops of the buns with a beaten egg mixed with a tablespoon of water. This step adds both color and a slight sheen.
  3. Bake:
    • Place the buns in the preheated oven and bake for 20–25 minutes.
    • They should be golden brown and sound hollow when tapped on the bottom. Proper baking time ensures the buns are cooked through without being dry.

Step 5: Glaze and Serve

  1. Prepare the Glaze:
    • While the buns are baking, heat the milk, butter, and sugar in a small saucepan over low heat.
    • Stir until the sugar dissolves completely. Important: Do not let the mixture boil, as this can alter the glaze’s consistency.
  2. Apply the Glaze:
    • As soon as the buns come out of the oven, brush them generously with the warm glaze.
    • This step not only adds a shiny finish but also enhances the moisture and flavor of the buns.
  3. Cool and Enjoy:
    • Transfer the glazed buns to a cooling rack.
    • Allow them to cool slightly before serving warm. Enjoying them fresh ensures the best texture and taste.

Tips for Perfect Chocolate Buns

Achieving the perfect chocolate bun involves attention to detail. Consider the following essential tips:

  • Use Fresh Yeast: Always check the expiration date on your yeast packet. Expired yeast may not activate properly, leading to dense buns.
  • Correct Milk Temperature: Ensure the milk is warm (110°F/45°C) but not hot. Too hot can kill the yeast, while too cold may not activate it.
  • Consistent Dough Texture: The dough should be slightly sticky but manageable. If it’s too sticky, add a tablespoon of flour at a time until it reaches the desired consistency.
  • Room Temperature Ingredients: Using room-temperature butter and egg helps them incorporate more evenly into the dough.
  • Avoid Overfilling: Too much filling can cause the buns to leak during baking. Stick to the recommended teaspoon amount for each bun.

Additionally, ensuring that your baking environment is warm and draft-free will greatly enhance the rising process. Therefore, consider using your oven light or a proofing box to maintain the ideal temperature.

Variations to Try

While the classic chocolate bun is delightful on its own, experimenting with different variations can add exciting flavors and textures:

Nutty Chocolate Buns

Enhance the texture by incorporating a delightful crunch. Sprinkle chopped hazelnuts or almonds over the chocolate filling before sealing the buns. This addition provides a pleasant contrast to the soft dough and rich chocolate.

White Chocolate Buns

For those who prefer a sweeter, creamier filling, substitute dark chocolate chips with white chocolate chips. This variation caters to different taste preferences and offers a unique flavor profile.

Cinnamon Chocolate Buns

Introduce a warm, spiced note by adding a teaspoon of ground cinnamon to the chocolate filling. The addition of cinnamon complements the chocolate, offering a cozy twist that is perfect for cooler months.

Vegan Chocolate Buns

To make the recipe vegan-friendly, implement the following substitutions:

  • Milk Substitute: Use almond, soy, or oat milk instead of dairy milk.
  • Butter Substitute: Replace butter with coconut oil or a vegan butter alternative.
  • Egg Substitute: Use a flaxseed egg by mixing 1 tablespoon ground flaxseed with 3 tablespoons water and letting it sit for 5 minutes to replace the egg.

These substitutions ensure that the buns remain delicious while accommodating dietary restrictions.

Serving Suggestions

Chocolate buns are versatile and can be served in various delightful ways:

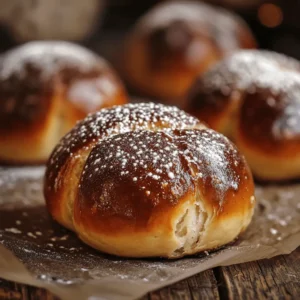
  • Dust with Powdered Sugar: For an elegant touch, sift powdered sugar over the cooled buns.
  • Drizzle with Chocolate Sauce: Enhance the chocolate experience by drizzling melted chocolate on top.
  • Pair with Fresh Fruit: Serve the buns with fresh berries for a refreshing contrast.
  • Accompany with Beverages:
    • Coffee or Espresso: The bitterness of coffee complements the sweetness of the buns.
    • Milk: A classic pairing, especially appreciated by children.

These serving ideas elevate the presentation and enjoyment of your chocolate buns. Consequently, you can customize your serving style to suit any occasion, whether it’s a casual family breakfast or a festive gathering.

Storing and Reheating

To maintain freshness and enjoy your buns over time, proper storage and reheating are essential:

Storing

  • Room Temperature: Keep the buns in an airtight container at room temperature for up to 2 days. This method is ideal for short-term storage.
  • Refrigeration: Store in the refrigerator for up to a week. Before serving, allow the buns to come to room temperature for the best texture.

Freezing

  • Freeze for Later: Wrap individual buns tightly in plastic wrap and place them in a freezer-safe bag. This prevents freezer burn and maintains flavor.
  • Storage Duration: Buns can be frozen for up to 3 months without significant loss of quality.

Reheating

  • Oven Method: Preheat the oven to 300°F (150°C). Place the buns on a baking tray and heat for 5–7 minutes. This method restores the buns’ original texture.
  • Microwave Method: For a quick option, heat individual buns on medium power for 20–30 seconds. Be cautious not to overheat, as this can make the buns tough.

Proper storage and reheating ensure that your chocolate buns remain enjoyable even days after baking. Therefore, you can prepare a large batch in advance and enjoy them over several days without compromising on quality.

Health and Nutritional Information

Understanding the nutritional content of your chocolate buns can help you make informed dietary choices:

  • Calories: Approximately 250 calories per bun.
  • Macronutrients:
    • Carbohydrates: High due to the flour and sugar content, providing energy.
    • Proteins: Moderate from the flour and egg, supporting muscle maintenance.
    • Fats: Includes healthy fats from butter and chocolate, essential for various bodily functions.
  • Fiber: Can be increased by substituting half the all-purpose flour with whole wheat flour, aiding in digestion.

Making Healthier Choices

If you’re looking to make your chocolate buns healthier, consider the following adjustments:

  • Reduce Sugar: Decrease the amount of granulated sugar in the dough to lower the overall calorie content.
  • Whole Grains: Use whole wheat or spelt flour instead of all-purpose flour to add more fiber and nutrients.
  • Dark Chocolate: Opt for chocolate with at least 70% cocoa content, which offers more antioxidants and a richer flavor.

These modifications allow you to enjoy your chocolate buns while adhering to healthier eating habits. Additionally, incorporating these changes can make the buns more suitable for various dietary requirements, broadening their appeal.

Common Mistakes to Avoid

Baking is both an art and a science. Avoiding common mistakes ensures that your chocolate buns turn out perfectly every time:

  • Inactive Yeast: If the yeast doesn’t foam during activation, it might be dead. Always start with fresh yeast to guarantee proper rising.
  • Over-Kneading: Excessive kneading can lead to tough buns. Knead until the dough is smooth and elastic, typically around 8–10 minutes by hand.
  • Under-Proofing: Insufficient rising time results in dense buns. Ensure the dough has doubled in size during both rises.
  • Overcrowding the Baking Tray: Place the buns with adequate space between them to allow even baking and expansion.

By being mindful of these potential pitfalls, you can achieve consistently excellent results. Consequently, your efforts in the kitchen will be rewarded with perfectly baked chocolate buns every time.

Frequently Asked Questions

Can I Make the Dough Ahead of Time?

Yes, you can. After the first rise, punch down the dough, cover it tightly, and refrigerate for up to 24 hours. When ready to use, let it come to room temperature and proceed with shaping. This flexibility allows you to prepare in advance, making the baking process more convenient.

What If I Don’t Have Instant Yeast?

Use active dry yeast instead. Activate it in warm milk with a pinch of sugar before adding it to the dry ingredients. This ensures the yeast is active and will properly leaven the dough.

Can I Use Milk Alternatives?

Absolutely. Almond milk, soy milk, or oat milk can replace dairy milk in the recipe. These alternatives work well and cater to those with lactose intolerance or dairy preferences.

How Do I Prevent the Filling from Leaking?

  • Seal Properly: Ensure the dough edges are tightly pinched together to prevent the filling from escaping during baking.
  • Chill the Filling: A slightly firmer filling is easier to handle and less likely to leak.

Implementing these techniques ensures that the chocolate filling remains intact, providing a delightful surprise in every bite.

Is the Glaze Necessary?

No, it’s optional. The glaze adds shine and a touch of sweetness but can be omitted or replaced with an egg wash before baking. If you prefer a less sweet option or have dietary restrictions, feel free to skip the glaze.

Troubleshooting Guide

Dough Isn’t Rising

  • Check Yeast Freshness: Expired yeast won’t activate properly. Always use fresh yeast for the best results.
  • Optimal Temperature: Dough rises best in a warm environment (75°F–85°F or 24°C–29°C). Ensure your kitchen is adequately warm or use a proofing box.

Buns Are Too Dense

  • Under-Kneading: Knead the dough until it’s smooth and elastic to develop sufficient gluten.
  • Over-Proofing: Allowing the dough to rise too long can cause it to collapse, resulting in dense buns. Monitor the rising process closely.

Buns Are Dry

  • Overbaking: Remove buns from the oven when they’re just golden brown to prevent dryness.
  • Incorrect Measurements: Ensure accurate measuring of ingredients, especially flour. Too much flour can lead to dry buns.

By addressing these common issues, you can refine your technique and improve the quality of your chocolate buns.

Additional Tips for Success

  • Flour Types: Bread flour can be used for a chewier texture due to its higher protein content. Alternatively, cake flour can yield a softer bun.
  • Temperature Checks: Use a thermometer to check the milk temperature for yeast activation, ensuring it’s neither too hot nor too cold.
  • Experiment with Fillings: Try jams, nut butters, or cream cheese for variety. This experimentation keeps the recipe exciting and allows you to discover new favorite flavors.
  • Patience is Key: Don’t rush the rising process; allowing the dough to rise properly results in fluffier buns.

Incorporating these tips can elevate your baking experience and lead to consistently excellent results.

The Joy of Baking Chocolate Buns

Baking is not just about the end product but also about the experience. The process of kneading the dough, watching it rise, and smelling the aroma that fills your kitchen are all part of the joy. Moreover, sharing these homemade chocolate buns with loved ones makes the effort even more rewarding. The satisfaction derived from creating something delicious from scratch is unparalleled.

“Pair your chocolate buns with a creamy homemade topping”
Healthy Cheesecake Recipe for a perfect pairing idea.

“Explore more sweet baked goods”
Cottage Cheese Bread Recipe for those who love experimenting with baking.

“Give your buns a seasonal twist”
Christmas Jello Recipes for festive inspiration.

“Learn how to create the ultimate baking staples”
Nestle Chocolate Chip Cookie Recipe to expand your chocolate recipe collection.

Conclusion

This easy chocolate bun recipe provides a comprehensive guide to baking delicious, fluffy buns filled with rich chocolate. By following the outlined steps and incorporating the provided tips, you’ll achieve bakery-quality results right in your own kitchen. Additionally, the various variations allow you to customize the buns to your liking, ensuring that each batch is unique and satisfying. Therefore, roll up your sleeves, gather your ingredients, and start baking these irresistible chocolate buns today!

Leave a Comment